In this article we will explain how to configure Megaport with Telnyx. See Telnyx guidance and requirements.
Megaport is a global leading Network as a Service provider transforming the way businesses connect to AWS Cloud https://www.megaport.com/services/amazon-web-services/. Our SDN and easy-to-use Portal enable users to provision instant and dedicated access to AWS Direct Connect across hundreds of global locations.
Additional resources:
Instructions for configuring Megaport with Telnyx
In this activity you will:
Pre-requisites:
- Ensure that your Telnyx Mission Command Portal is configured properly
- RECOMMENDED: Enable TLS to encrypt your traffic
- Megaport ports must be live on both ends
Video Walkthrough
Setting up your Telnyx SIP portal account so you can make and receive calls:
| Note: Video walkthrough for Megaport/Telnyx configuration coming soon. Check back as we update our docs. |
1. Create a connection between Telnyx and the Megaport portal
In this section, you'll set up a configuration from the customer side to connect Telnyx to your Megaport portal. This needs to be done in order to use the service key provided by Telnyx.
-
Log into your Megaport portal account.
-
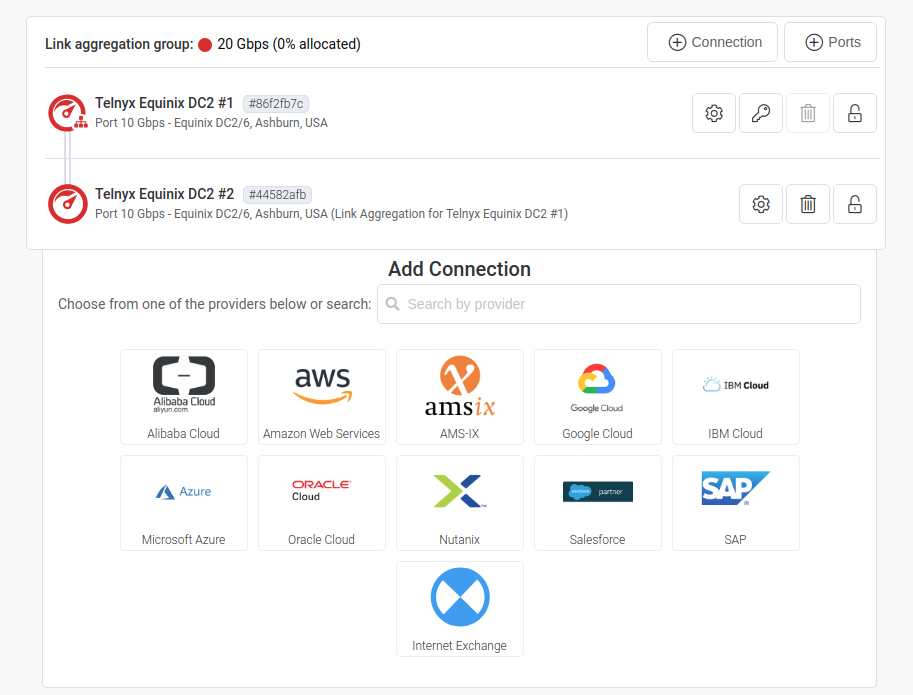
Click + Connection.
-
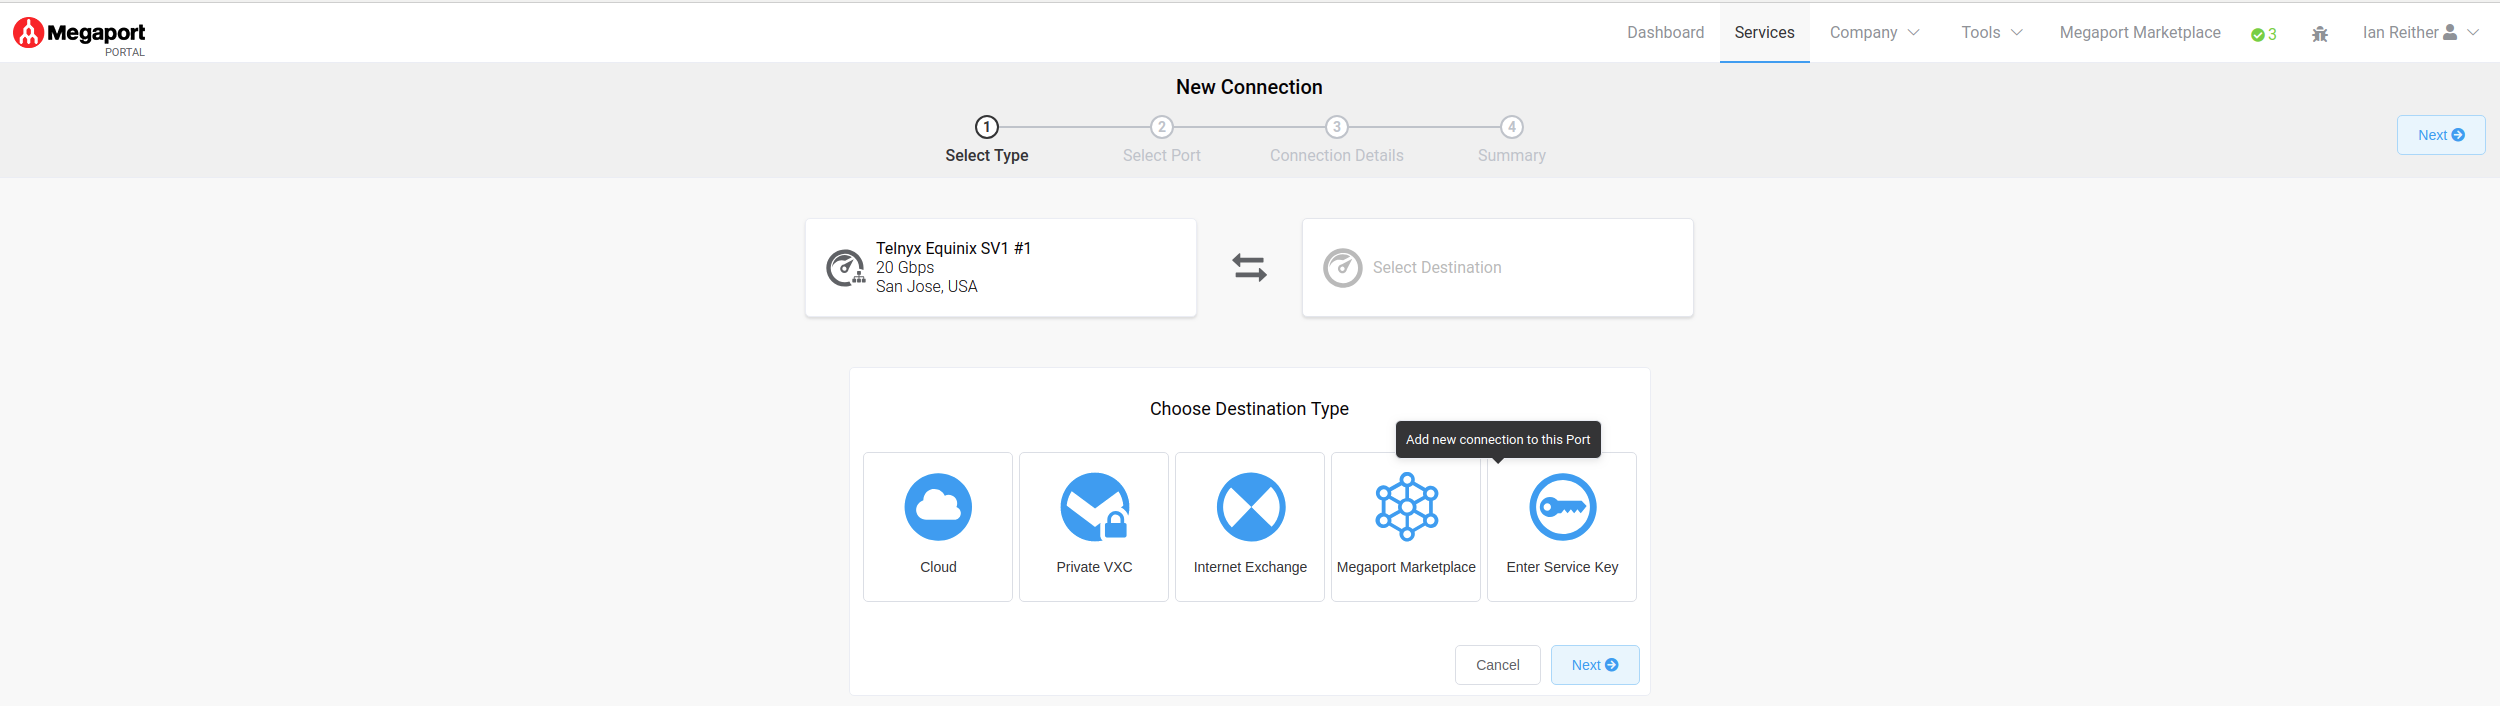
Click Enter Service Key.
-
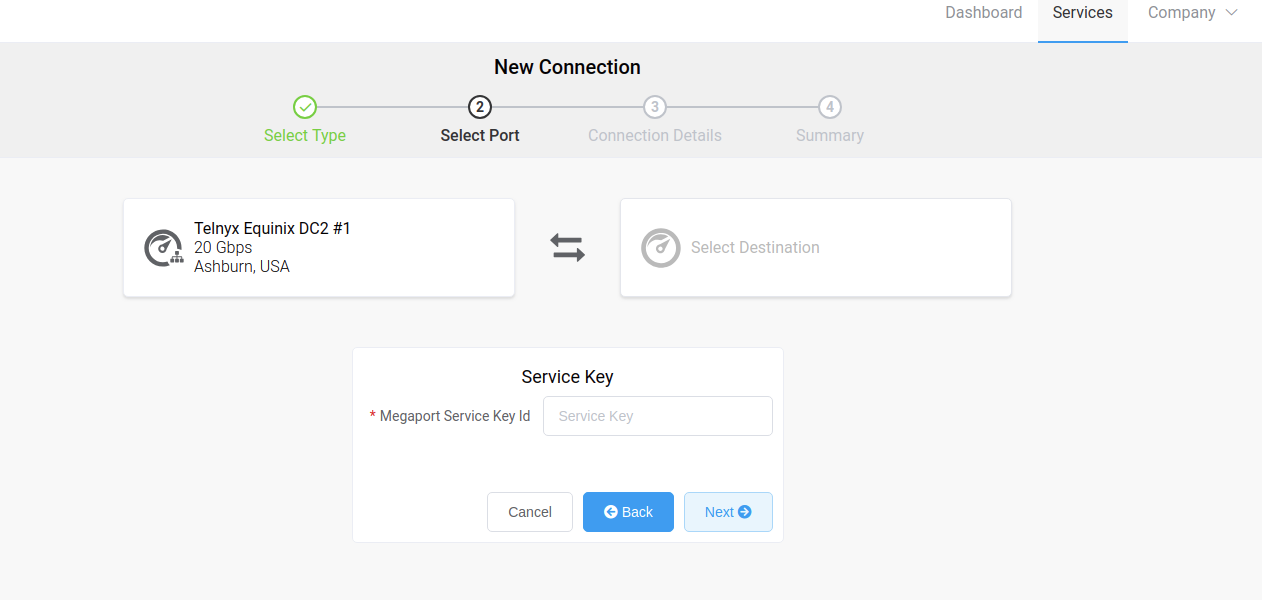
Provide the following information:
-
Megaport Service Key ID: Enter the service key provided by Telnyx. The data from this key will populate. If you did not receive a service key, or are unsure, contact Telnyx Support.
-
-
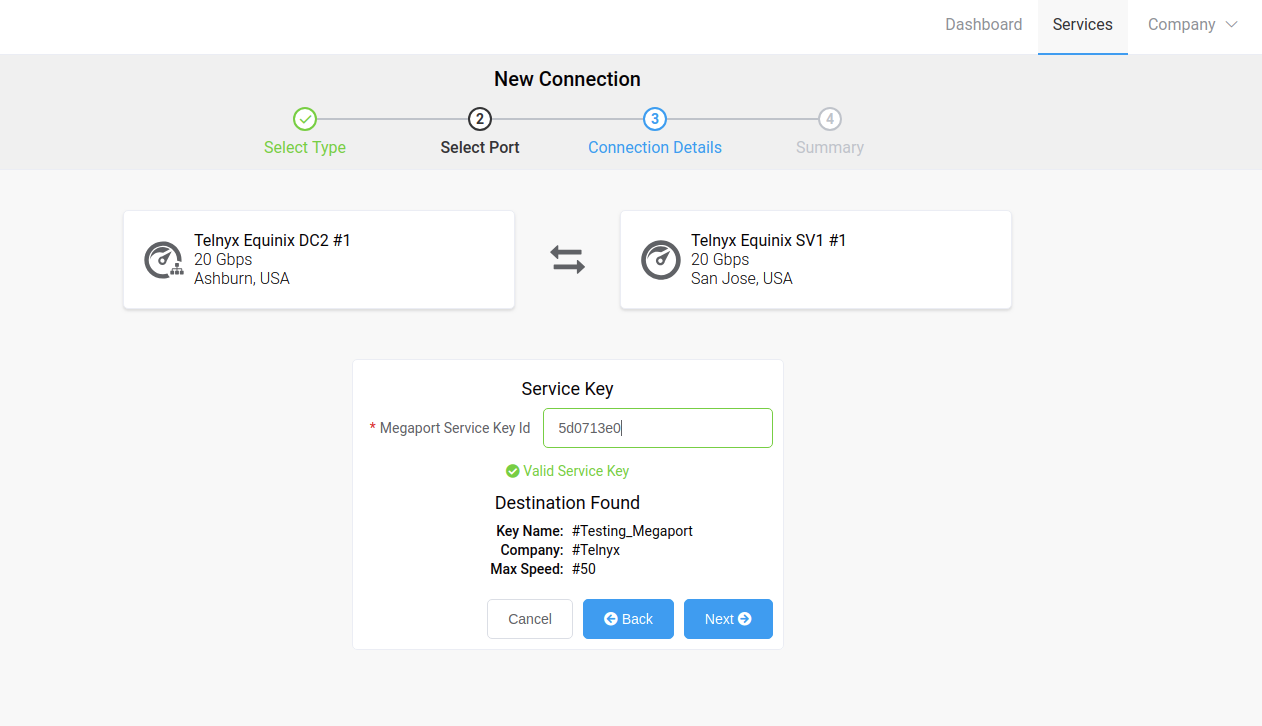
Once you've entered your service key, you'll notice that the details have updated on your screen.
-
Click Next.
-
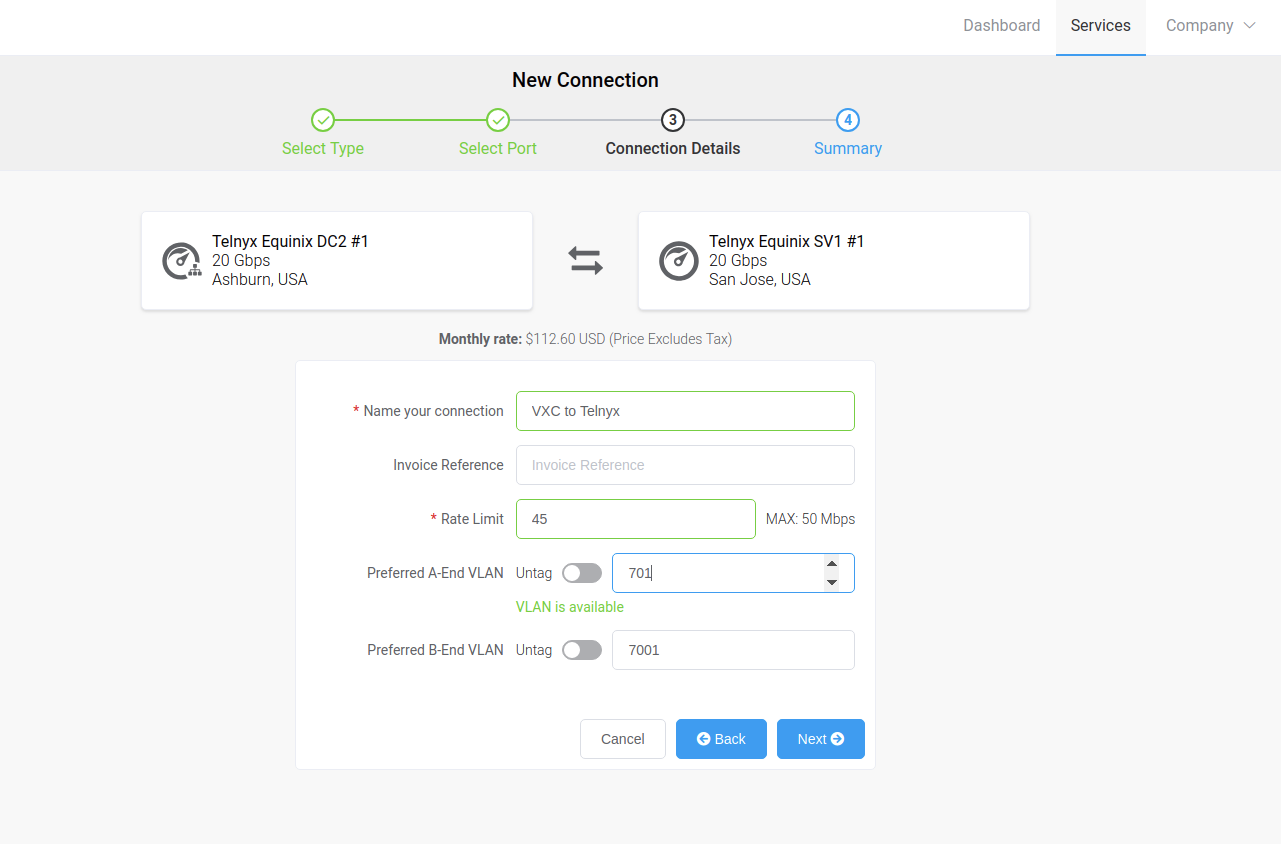
You'll be taken to a form where you'll need to confirm the following auto-filled details:
-
Name your connection: You can name this anything you like. We recommend something that can help you easily identify your connection and its purpose.
-
Rate limit: This limits network traffic and puts a cap on how often someone can repeat an action within a certain timeframe – for instance, trying to log in to an account. Rate limiting can help stop certain kinds of malicious bot activity.
-
Preferred A-End VLAN: Each VXC is delivered as a separate VLAN on your Port. This must be a unique VLAN ID on this Port and can range from 2 to 4093. If you specify a VLAN ID that is already in use, the system displays the next available VLAN number. The VLAN ID must be unique to proceed with the order. If you don’t specify a value, Megaport will assign one.
-
-
Click Next.
-
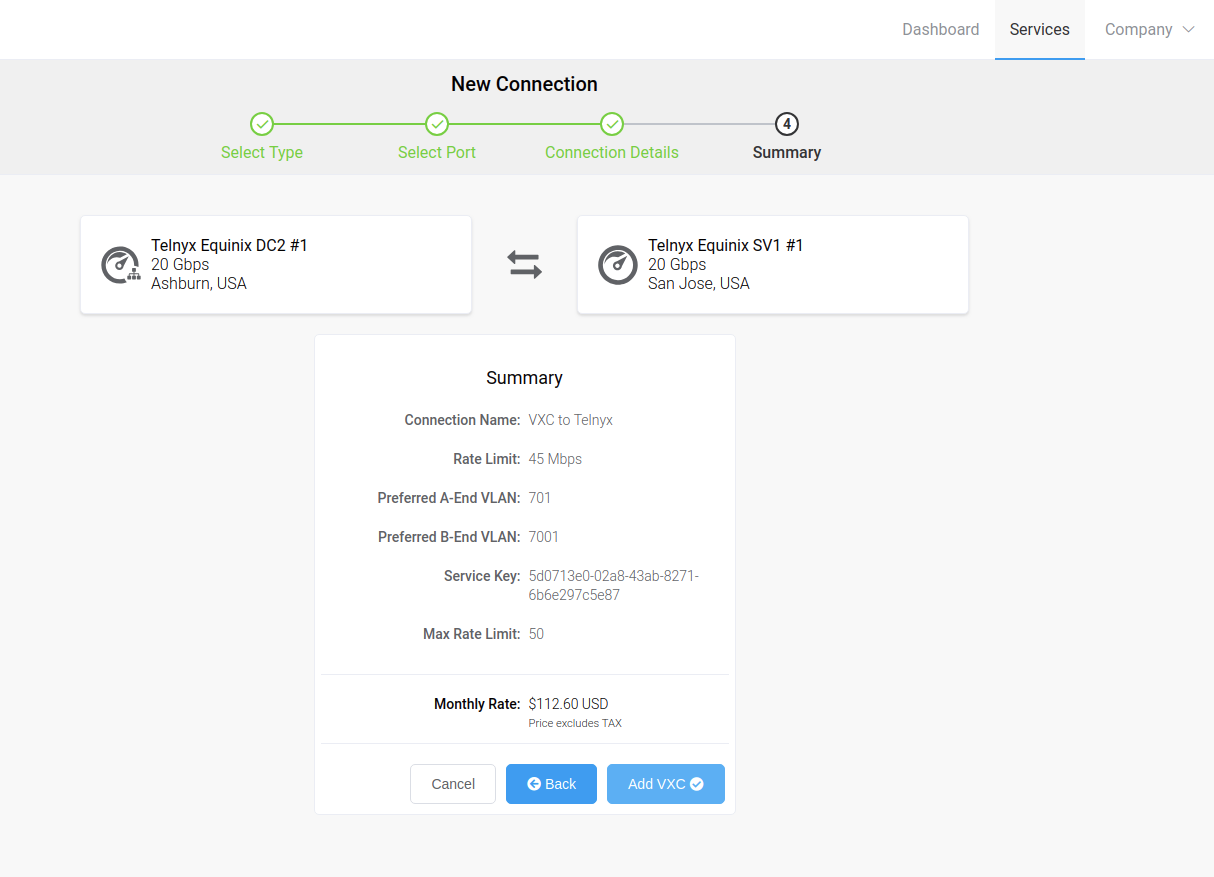
Once you've confirmed all your details, click Add VXC to update your ordering cart.
-
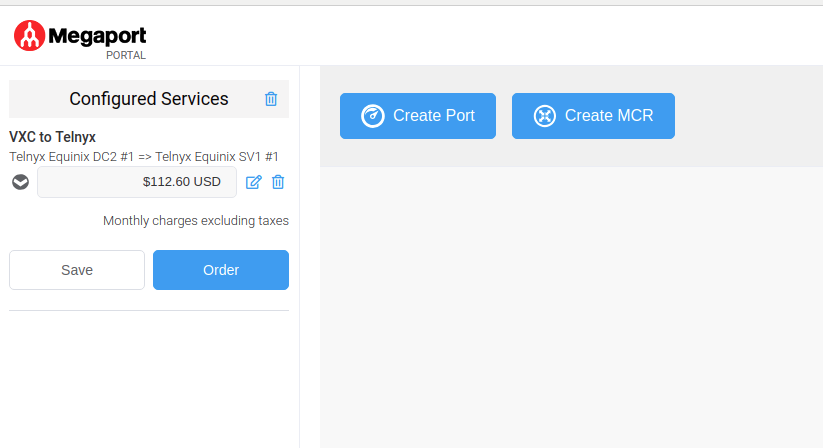
When you're ready, view your cart and click on Order. This will send an email to Telnyx for approval. Once Telnyx approves your connection, this creates the VXC between your Megaport setup and Telnyx.
That's it! You've finished configuring Megaport with Telnyx.
Additional Resources
Review our getting started with guide to make sure your Telnyx Mission Control Portal account is setup correctly!
Additionally, check out: